Instructions for installation of
™The Sentinel Bi-fold Door Stop
Installation Video
The Sentinel Bi-fold Door Stop™
A short video showing how to install the Sentinel.
Click on video title (after pressing play) for larger screen.
Download PDF of revised Instructions
Download
Installation Instructions for
The Sentinel Bi-fold Door Stop™ Patent Pending
Installation Instructions for
The Sentinel Bi-fold Door Stop™ Patent Pending
The Bi-fold Sentinel™ is designed to prevent damage to bi-fold doors and the hardware components. The Sentinel protects the top pivot bracket and pins by absorbing the impact of the door opening. The Sentinel protects the track channel and pins by preventing rotation of the open door when the door handle is pulled in the wrong direction. The Sentinel works with the most common bifold hardware systems. The Bifold doors and hardware should be in good working order, or repaired if needed before installing the Sentinel.


1 Attach the two self-adhesive pads as shown.
1 Attach the two self-adhesive pads as shown.

2 The door should be in the open position. Use the spacer clips while positioning to allow a small gap between the Sentinel and the door stiles. Hold the Sentinel against the door stiles, making sure the base is not tilted.
Install the two screws (1) through the slotted holes as shown. Remove the spacer clips. Open and close the door gently. Adjust the Sentinel position if needed, so that it does not obstruct the door.


If the spacer clips are not available, hold the Sentinel against the door stiles. Install the two screws (1) through the slotted holes as shown. Leave the screws loose enough that The Sentinel position can be backed off to leave a1/10” gap (as shown).
Open and close the door gently. Adjust the Sentinel position if needed, so that it does not obstruct the door. Gently tighten the two screws.
Open and close the door gently. Adjust the Sentinel position if needed, so that it does not obstruct the door. Gently tighten the two screws.
3 When satisfied the Sentinel is in the best position, install screw 2 and then screw 3. Be careful not to over tighten the screws. This can result in the Sentinel being tilted and obstructing the movement of the door.
3 When satisfied the Sentinel is in the best position, install screw 2 and then screw 3. Be careful not to over tighten the screws. This can result in the Sentinel being tilted and obstructing the movement of the door.

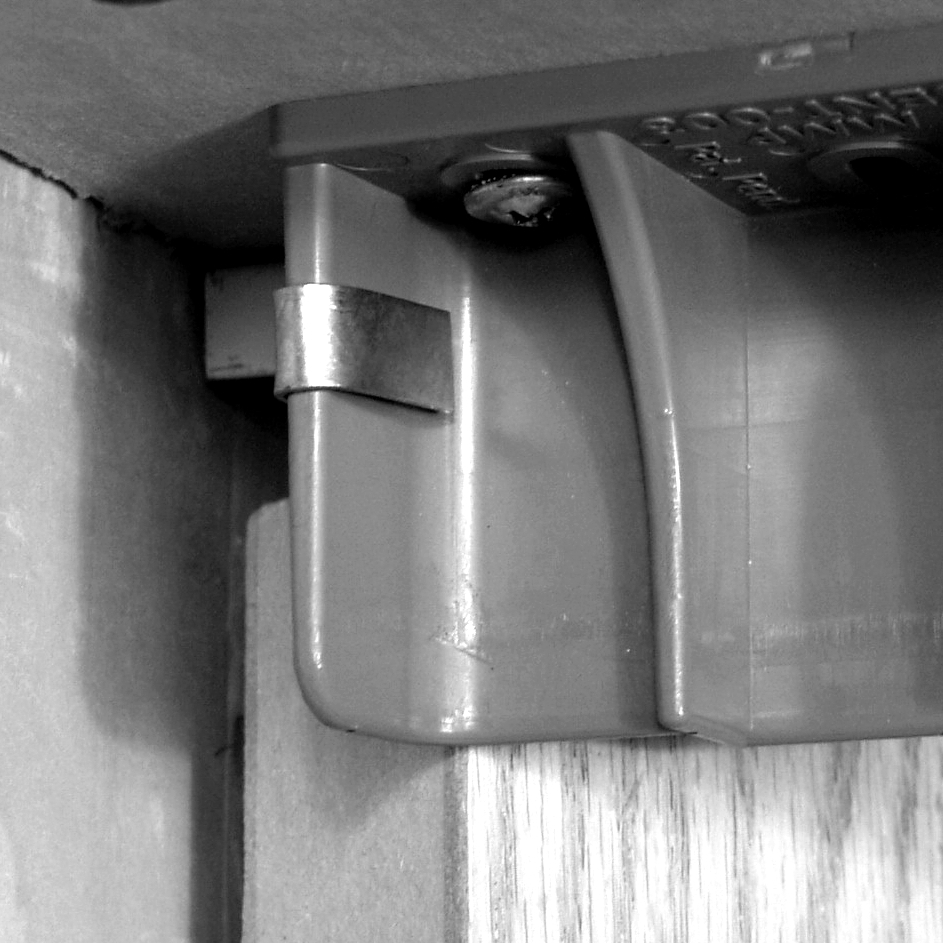
The brace should not pull hard on the pivot pin. The door may bind if the brace is too tight.
4 The pivot pin brace provides additional protection when there is no decorative molding in front of the track.
The brace is hooked around the pivot pin, and then folded around the Sentinel wall as shown. It is helpful to mark the brace against the Sentinel before folding to 90 degrees with pliers. Finish bending the brace around the Sentinel wall with pliers, or Channellocks.
It is also possible to bend the brace in situ by hand, but the brace may not be tight enough to function properly. The clip can be removed and reused several times.

